How to create a Utility Order Form via E-Sign

Step 1: Enter Property Details
Select property address:
- Use the dropdown to search for an address or click "Or add an address manually".

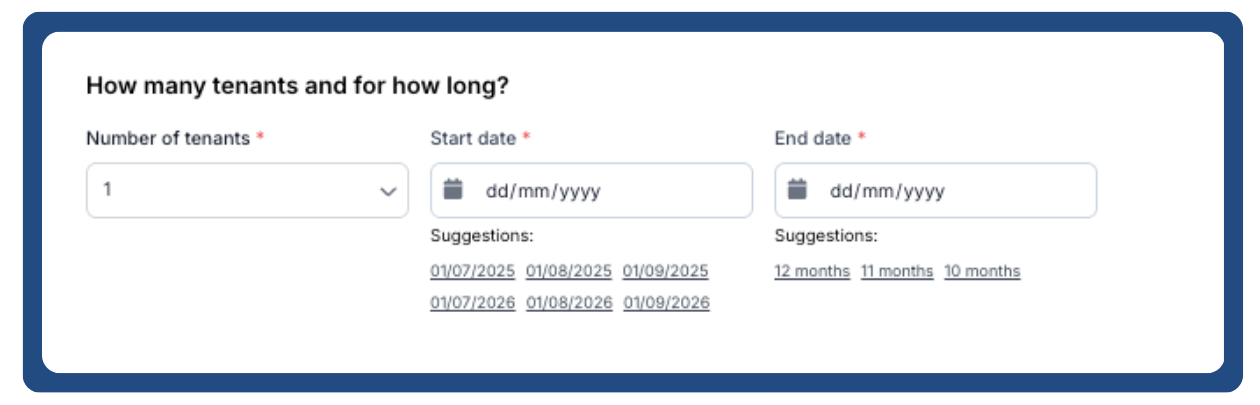
- Enter tenancy details:
- Number of tenants: Use the dropdown to select how many people will live there.
- Start date and End date: Choose using the calendar picker or select a suggested date below the field.
- Select tenant type:
- Click Student, Non-student, or Mixed depending on who’s renting.

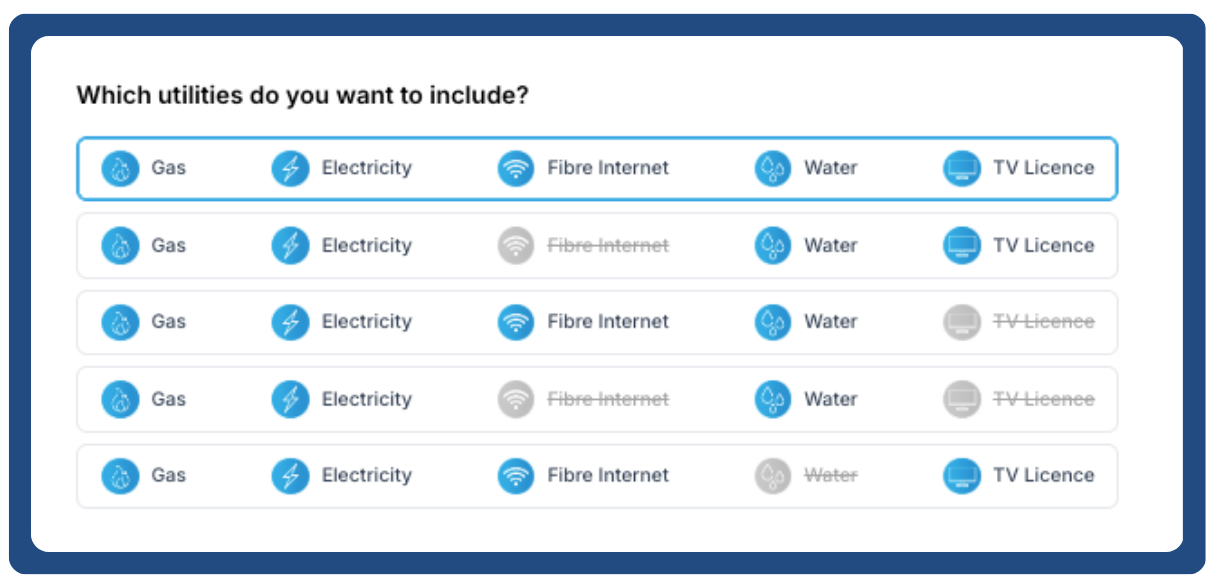
- Choose included utilities:
- Click to select which utilities you want:
- Gas
- Electricity
- Fibre Internet
- Water
- TV Licence - The selected row will be highlighted.
- Click to select which utilities you want:
Step 2: Enter Tenant Details
- Lead tenant:
- Fill in Title, First name, Last name, Email address, and Mobile number.
- Other tenants (if applicable):
- Repeat the same details for each additional tenant (Tenant 2, 3, 4, etc.).

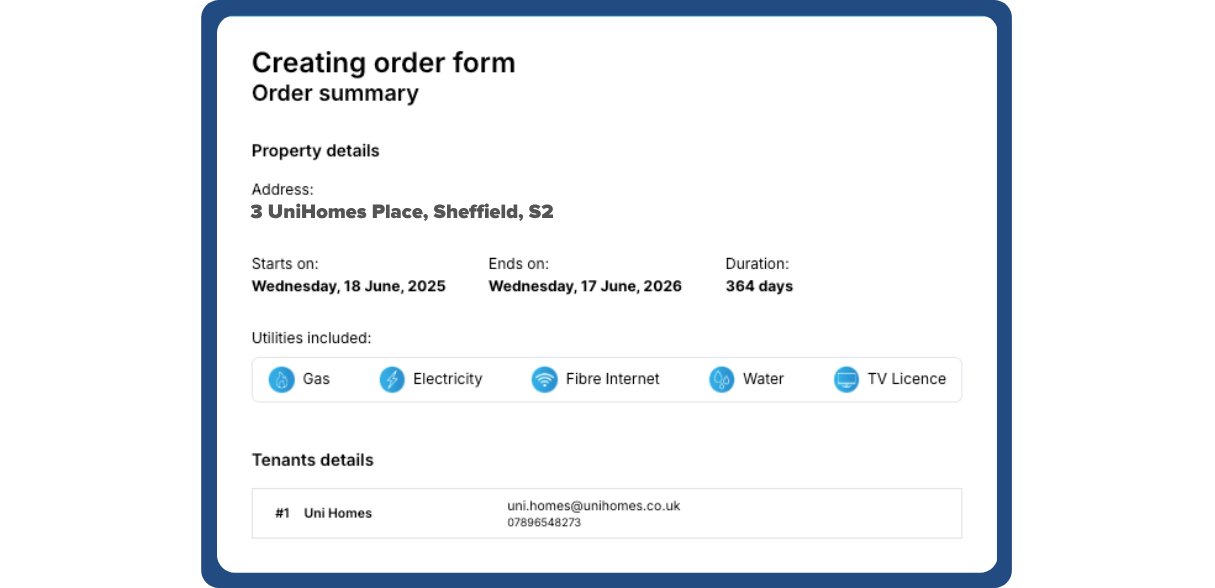
Step 3: Review Order Summary
- Double-check the following:
- Property address
- Start and end date
- Tenancy duration
- Utilities included
- Tenant details (name, email, phone)
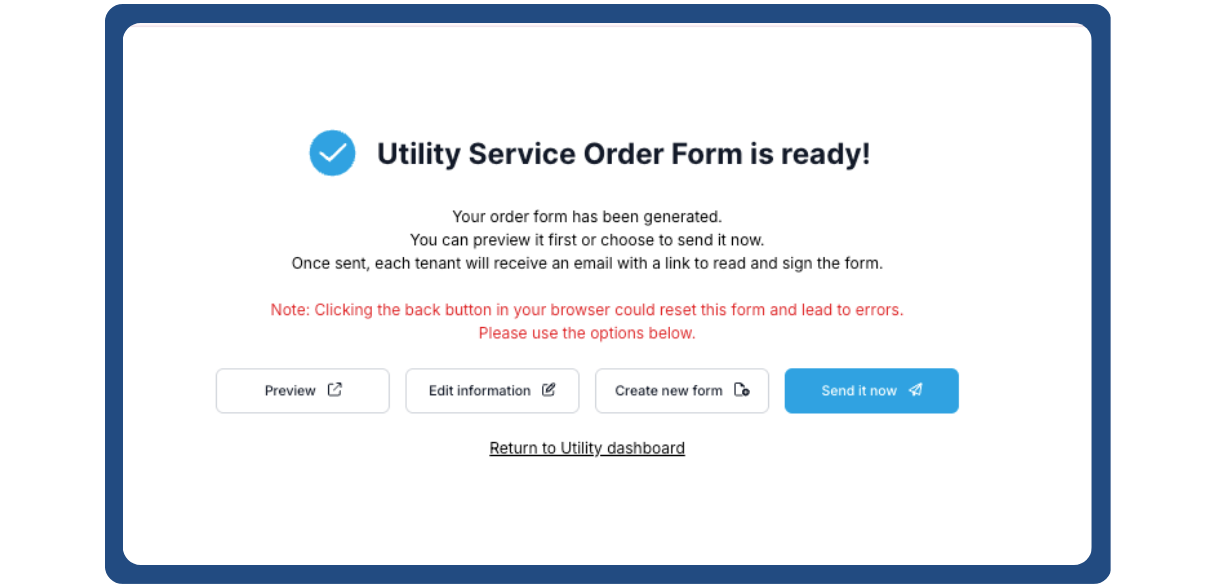
Final Step
- Click "Submit", "Confirm Order", or a similar button (typically at the bottom or in Step 4).
- You may receive a confirmation email once it is completed.